Electra - For ultimate smooth
flying, add a gyro to the ailerons.
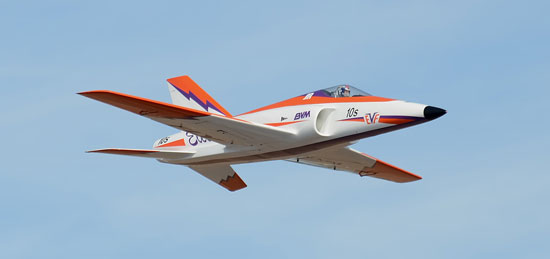
photo by: David Hart
This 6 year old Electra has served us well as an
EVF 10S powered demonstrator. This recent upgrade in technology gives it
new life and appeal to customers that are keen on smoothness in flight and a
rock solid landing approach and touchdown.
|
|

click on image to enlarge |
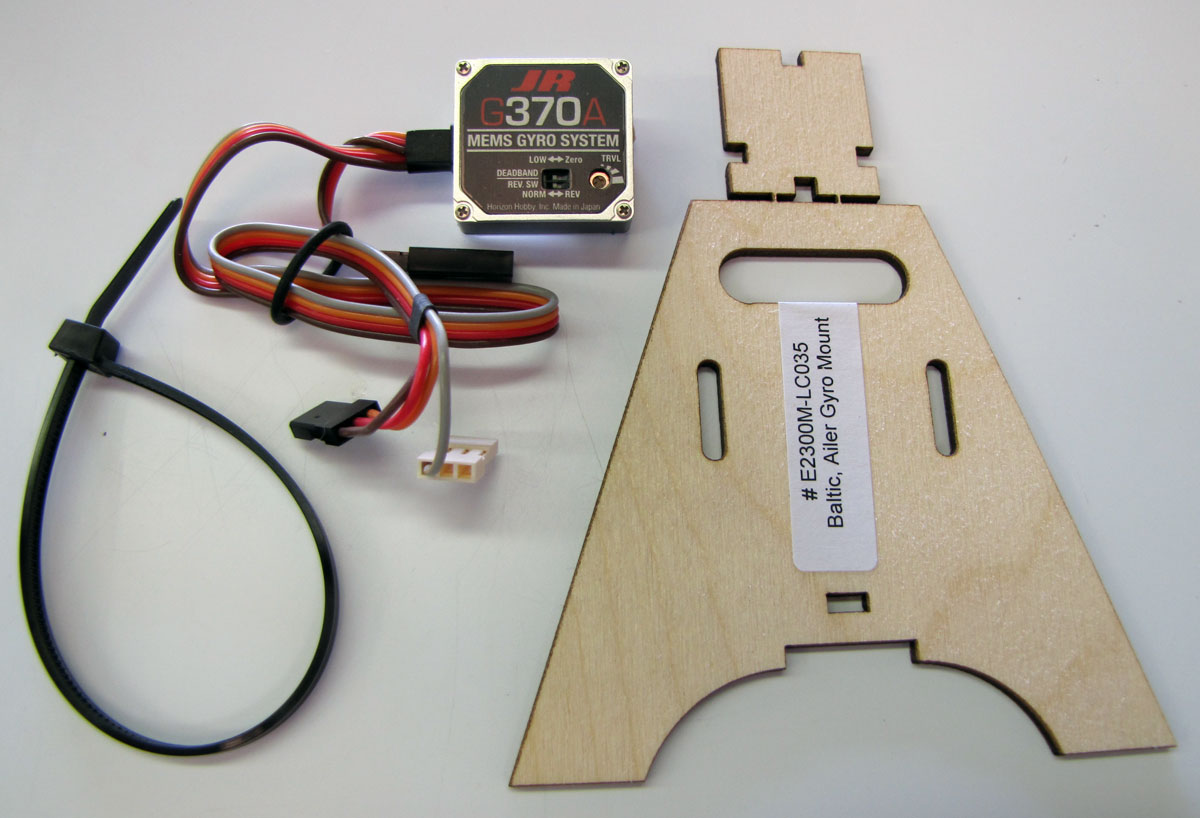
These items
come with your JR 370A when purchased from BVM. |
We used the JR 370A (for airplane) Gyro
because it is so convenient to mount and adjust for flight and landing.
click on image to enlarge
|
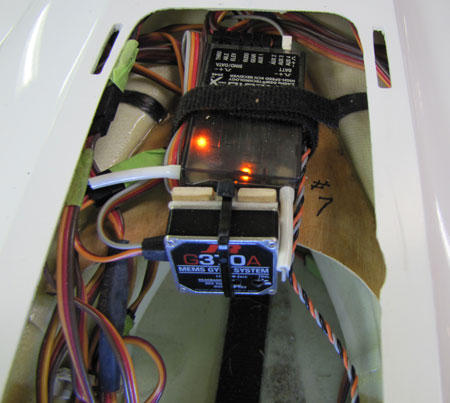
This Electra has been guided by an early JR
Spektrum 7 radio. It now sports a Spektrum AR9010X receiver with a
JR 12X Transmitter. The "Gyro Sens" feature allows independent adjustment
of gyro gain in the flaps up, flaps at take-off, and flaps set for landing.
Use the JR 370A instructions to properly connect and set-up the
gyro.
These numbers are flight tested in
our Electra: flaps up 9%, flaps T.O.
20%, flaps landing 30%.
After test flying yours, you
may want to adjust them a bit to fit your preference.
To Mount the gyro:
Replace the receiver mount with the new 1/8" ply part
supplied. Glue the rectangular part to it as
pictured and apply a Zap finish to the forward side.
Then, attach the Gyro with double sided sponge tape and
the tie wrap. The forward face of the Gyro should be
perpendicular to the central axis of the model. The top edge of the Gyro and its ply
mount should be even with the top of the fuse flange. This allows a 4S
6600mAh battery to be inserted below (for a 12S set-up) and does not interfere
with the cockpit deck. |
Note: This package of 370A Gyro and
installation parts are available from BVM.
Part # E2300-85
Price $164.99

Contact Us
All graphics, photos, and text
Copyright 2014 BVM, Inc.
Use of graphics or photos without written permission from
BVM is
strictly prohibited. |