|
A little History
BVM has been operating model size gas turbines since 1995 when the first
JPX propane fueled engines became available. We designed and manufactured
correct flow path components such as the first ByPass duct that coupled the
inlets to the stainless Steel Tailpipe while helping to keep the engines running
cool and protect the model’s internal structure from heat. Kerosene fueled
engines from RAM and AMT were next on the market followed shortly by JetCat.
All of these early engines required an external source of compressed air to
spool-up the engine. Some manual manipulation of fuel valve, propane valves,
and ignition required training, practice and some technique to get the engine
started.
Personally, I thought this was fun and a rewarding experience for an R/C
Jet Pilot. Since it was a “hands on” operation and proper technique was required
to not over-temp the engine, one’s attention to the turbine temperature during
start and first throttle-up was absolutely required. If the temperature rise
looked like it was going to exceed the published limit (~800°), the pilot in
command simply closed the fuel valve(s) and continued the application of the
compressed air to cool things down. If it wasn’t improper technique, inadequate
air pressure, or too much propane pressure that caused the problem, a visual
inspection of compressor and turbine wheel blades was in order before another
attempt to start.
Fast Forward to Automation
Completely automatic ECU (Engine Control Unit) control of engine start,
throttle control, and shut down are now the norm and offers convenience, some
safe guards, and less equipment on the field.
My guess is that the new technology works perfectly 95% of the time which has
lulled many “Turbine Wavier” qualified pilots into complacency.
During the last few years at several jet events, we have witnessed pilots
bring their jet models to the start-up area with the hatches closed on the
model, fuel valves open (or not installed), no ground service unit (GSU)
connected to the ECU and no fire bottle close by. Proudly they stand back,
advance the transmitter throttle and watch their jet come to life. And 95% of
the time, it does as commanded. It is that 5% of the time that they are flirting
with possible sever damage to the inside of the model, endangerment to
bystanders, and/or catastrophic in-flight airframe failure.
The two most important parameters of turbine operation are temperature and
vibration. The complacent operation described above monitors neither. It is a
formula for the inevitable small problem to become a very big problem. Multiple
hot and flaming starts cause accumulating damage to tailpipes and ByPass
components until eventually the aft end of the model suffers structural failure
and uncontrolled flight. Nobody wants to see this happen, but it is occurring
more now than earlier in our 17 year old sport. At the very least, it is an
expensive adventure for the airplane owner. At the extreme, it is a risk of
personal injury and severe property damage. This behavior is not reflective of
the extra responsibility required by AMA Turbine Wavier Pilots.
Engine and Airframe Inspection
As a young Naval Aviator, I never strapped into the ejection seat of a Navy
Fighter/Attack aircraft without first visually inspecting the compressor and
turbine blades with a flashlight during the “Walk Around” preflight inspection.
Be assured that when you ride on an airliner, a crew member or mechanic has
done the same. Ultimately, in both scenarios, it is the pilot’s responsibility
for safe operation.
If the model has had an off-the-runway excursion, a failed nose gear landing
etc. one should remove the hatches and use a small mirror and light to inspect
the compressor wheel and turbine blades. Of course, a more thorough inspection
of the blades can be accomplished by removing the engine from the airframe.
Your engine manufacture’s Operation Manual deals with failed, wet, or hot
starts. It is expected that you know and follow these procedures. If your
engine is full of fuel from a failed start, unless you purge it properly, expect
a tailpipe fire.
Besides the “start-up” being a challenge to turbine temperature limits,
“throttle-up” from idle during taxi causes temperature spikes. Add the extra
rolling resistance on a grassfield, and wind up the tailpipe, and it is easy to
understand these added stresses. One method to counter this is to adjust the
engine idle RPM up 2-4000 RPM. Refer to the engine Operation Manual to
accomplish this.
Another warning sign that requires corrective action occurs if the engine
“stutters” on throttle-up for taxi. This can be a sign of engine compressor
damage or an indication that some fuel pump voltage parameters need adjustment.
Tailpipe wear and tear and the need to inspect it
Besides hot and/or flaming wet starts potentially damaging the tailpipe, a
smoke system ignition can also stress this spot welded stainless steel
component. It is good practice to inspect the tailpipe with a flashlight.
Besides checking that the engine exhaust nozzle is still centered, you will want
to look for popped rivets or more than a slight bit of rippling. Discoloration
towards a bronze color is normal. A crimson color indicates exposure to higher
temps. A blue color indicates very high temps and possible metal fatigue. Do
not fly a turbine powered jet with a compromised tailpipe, it will only get
worse and eventually cause a serious problem.
Tailpipe Attachment and Support
Models equipped with a properly designed Bypass duct generally have good
support for the front of the tailpipe. Redundancy in how the two are affixed is
good design. “Dump Diffuser” design installations, i.e. no Bypass, sometimes
rely on just two stainless steel straps spot welded to the tailpipe at the 3 and
9 o’clock positions and then screwed to a plywood engine mount 3-5 inches
forward of the tailpipe. This arrangement offers little resistant to positive
“G” forces that are most common in flight and on firm landings. We suggest a
shaped former (see photo below) that cradles the forward end of the tailpipe
transferring positive “G” loads to the fuse bottom. Note that the steel straps
are spot welded to the tailpipe. Inspect these welds often.
Know that some of
the products made in China are not thoroughly tested. But, this is the
marketplace now and what consumers choose because of price. So as consumers,
you need to know enough to guard against the above mentioned issues.
Think about it, you are operating a high performance machine that is powered
by fire breathing 110,000+ RPM engine. We are simulating real fighter jet power
and performance so we must also accept the periodic inspections, maintenance,
and responsible behavior to keep it operating safely.
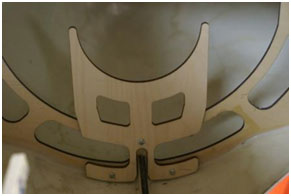
The tailpipe support former shown is part of a BVM upgrade to
a Skymaster Cougar.
A better understanding of what’s going on inside our ultimate performance
machines and attention to the details of the proper flow path for the hot gases
will allow us to enjoy the “fun” part of our sport and avoid the calamity of a
fuselage fire associated with poor design and complacent operation.

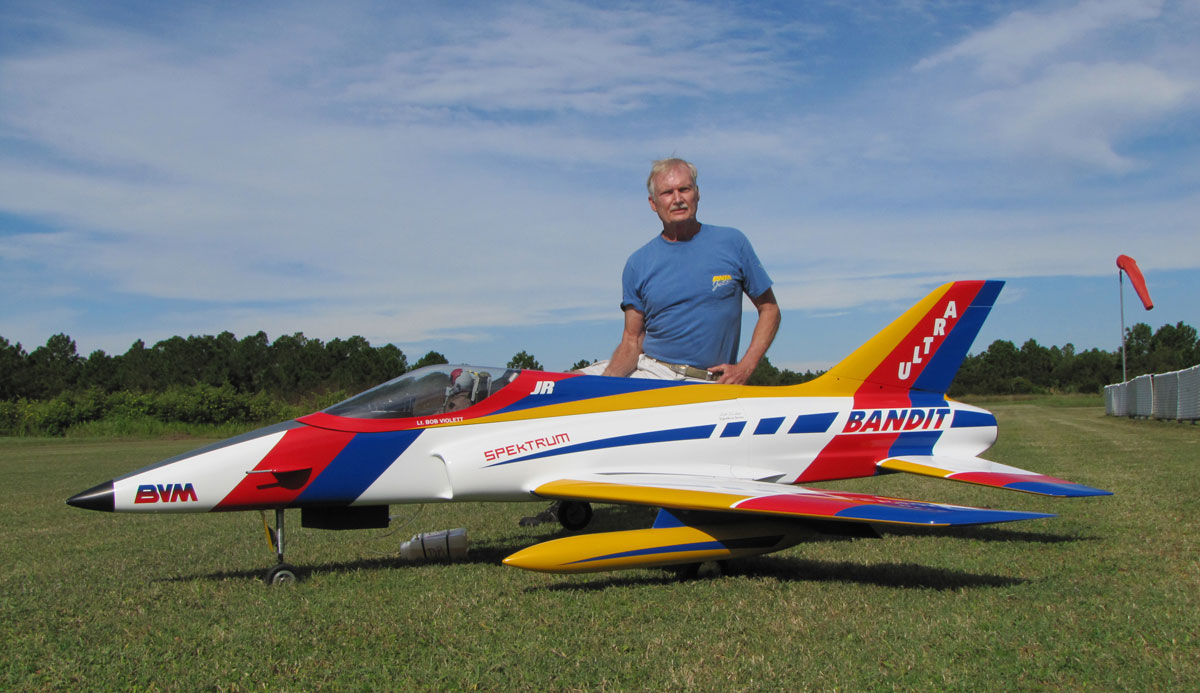
I maintain my “turbine qualification” with BVM jets like this 7 year old
Ultra Bandit with JetCat P-200SX power. We call it “Pilot Proficiency Training”
while having fun.
|